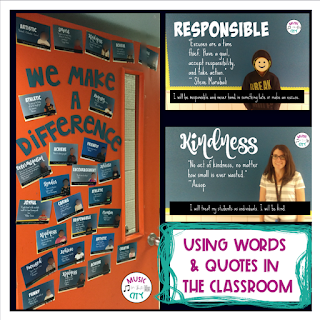
We Make a Difference - Using Words & Quotes in the Classroom
Words and quotes. Two powerful things that can get your students to think about their strengths and motivate them to reach their full potential. Empowered students can make a difference in their families, their schools, and the world around them.
Molly Maloy from Lessons with Laughter has a great idea about using a student photo wall to build community in the classroom. Her blog post gives step by step instructions about how to set this up so check it out!
I used this with my students in September but I think it would have been more powerful to use after the Winter Break. My kids had a challenging time searching for quotes or finding ones that actually matched their word. After a few months of Keep the Quote, I feel that they would be much more successful with this activity.
Here's how I adapted this idea for my classroom:
1. Model, model, model!
I cannot stress this enough - if only as a reminder to myself - students need to be shown samples and given examples. Display your own We Make a Difference photo and brainstorm, as a class, some words they could choose from. Show students how to use Google to find a quote that would match their word.
2. Take pictures of students
I did this during independent reading time. My plan was to take the students outside with their books and take the photos with a beautiful nature backdrop but that didn't happen. I had them stand in front of our blank bulletin board outside the classroom and used that for the background instead, making sure there was a large empty space on their right so there would be space to add the text later.
3. Assign homework
For homework, students used this handout to complete the "Word" and "Quote" section only. You can access it here.
4. Mission Statement
The next day I model how I take my word and quote and turn it into a mission statement starting with "I will..." Have students work together at their table groups to use their words and quotes to form a mission statement. Students will complete the "Mission Statement" section of the handout and hand their completed sheet in.
5. Add text to the photos
Molly used Powerpoint to add text to her photos and includes an excellent template on her blog. At the time, I was more comfortable with PicMonkey. They used to have a free version but it appears that they have switched to a subscription model.
6. Create your title and display the photos. I used my Silhouette to cut out the letters and attached the photos using sticky tack to the inside of my door. They were up all year and most were still in great shape by the end.
This is a really powerful display and I had many comments on it from my Principal, other teachers and parents. The gears in my brain are turning and I have some ideas about how I can adapt this for the Music classroom - specifically with Year 2 students. Stay tuned - although you'll have to wait until I'm back in the classroom in September.


Comments
Post a Comment